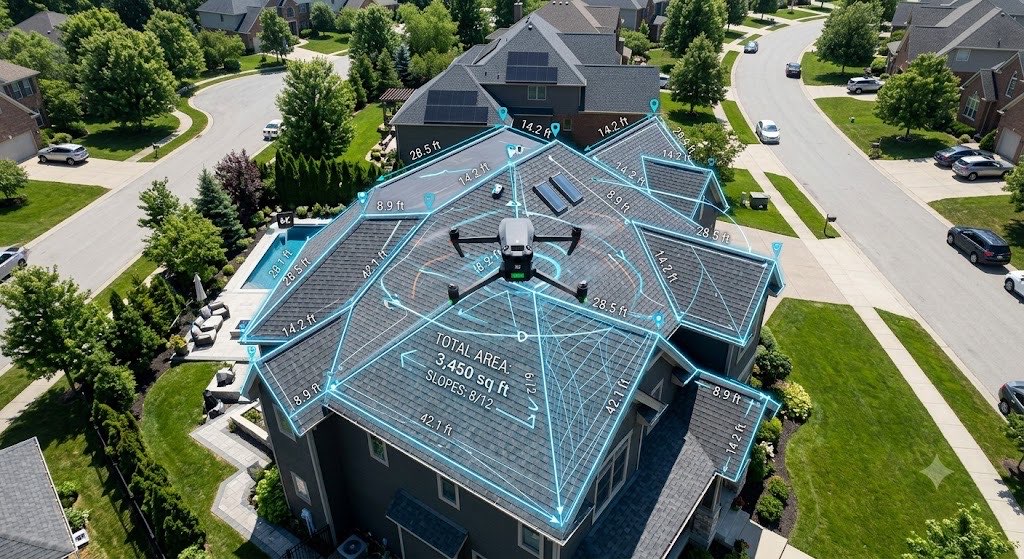
How to Build a Roofing Proposal in Under 5 Minutes (Roof Manager Proposal Builder Guide)
Reviewed by roofing measurement engineers · References NBC 2020, IRC 2021, FBC 8th Ed. · Roof Manager is the roof measurement & CRM platform trusted by 5,000+ contractors across the US & Canada · Editorial policy.
TL;DR
Roof Manager's proposal builder generates a roofing proposal straight from a satellite roof measurement report. Attach the report, press Calculate Materials, and the take-off is done. Finish it three ways: manual line items, a preset pricing template that builds it in one click, or Draft with Rover. Then send a private link the homeowner can accept and sign online.
Ask most roofing contractors when they write proposals and you get the same answer: after supper, at the kitchen table, from a notebook of hand-scribbled measurements.
That is where margin dies. Not on the roof — on the laptop at 9pm, when a tired estimator squares the wrong plane, forgets the waste factor on a cut-up hip roof, or sends a quote three days late to a homeowner who already signed with someone else.
This guide covers how to use the Proposal Builder in Roof Manager to remove that failure point — for roofing contractors, restoration companies, solar installers and insurance adjusters.
What is the Roof Manager proposal builder?
Roof Manager is a Canadian roofing platform that pairs satellite roof measurement reports with a free contractor CRM. The proposal builder turns one of those reports into a branded, signable customer document.
Its design principle is what separates it from a generic quoting tool:
The measurement report is the single source of truth. The proposal is generated from it — not re-typed alongside it.
When the roof is measured once from satellite imagery at 99% accuracy and the quote draws its quantities from that same measurement, an entire category of error disappears. There is no transcription step between the roof and the proposal, so there is nothing to transcribe wrong.
The three ways to build a proposal
| Method | Best for | Time |
|---|---|---|
| Manual line items | First proposals, unusual scopes, custom repair work | ~10 min |
| Preset pricing template + Build from Report | Everyday production work, storm work at volume | One click |
| Draft with Rover (AI) | Fast drafts, scope-of-work wording | ~1 min |
Most contractors end up using all three: templates for bread-and-butter replacements, Rover for odd jobs, manual editing to fine-tune before sending. The proposal builder sits inside the same CRM as your pipeline — see how to manage roofing leads and customers for the stage the proposal fits into.
Before you start: order the roof measurement report
The builder works from a report, so the report comes first. Enter the property address and order the measurement. Reports are $10 CAD each, your first two free with no credit card, typically delivered in under 60 minutes at 99% accuracy. Step-by-step: how to order a roof measurement report, and see a real finished report before you order one. On price, how $10 compares to the incumbents.
What arrives is not just a square count:
- 3D sloped surface areas — true measured area, not a flattened footprint
- Edge take-offs — linear footage for ridge, hip, valley, eave and rake
- Plane-by-plane data — so complex roofs get bid correctly instead of averaged
- Pitch per plane and aerial diagrams — homeowner-legible proof of the roof
- Complexity rating and waste percentage — the two numbers that decide whether the job makes money
- An itemized material bill — which is what your line items price against
That last item is the hinge. The report already knows the roof is 34.5 squares at a 9/12 pitch with 212 feet of ridge and 88 feet of valley, so the proposal does not need you to tell it any of that. If you want the methodology behind the numbers, see how to measure a roof without climbing it.
How to build a roofing proposal in Roof Manager: step by step
Step 1: Start a proposal and attach the roof report
Go to the Proposals module and start a new proposal. Pick the roof report for that property from your report list — that is the attached report, and everything downstream keys off it.
With the report attached, press Calculate Materials and the builder generates the take-off: quantities for each material, derived from the roof's sloped areas, edge lengths, plane data and waste percentage. You did not type a single measurement.
Step 2: Add your pricing and line items
Build out the scope: tear-off, underlayment, ice and water shield, shingles, ridge cap, flashing, ventilation, disposal, permits. The builder supports line items, tax and discounts under your own branding. Because the report supplies the quantities, your job here is pricing, not measuring — and if you have set up a preset template (below), this step is already done.
Margin tip: Put the report's waste percentage in as a visible line, not a hidden markup. A homeowner who sees "18% waste factor — complex hip roof, 6 planes" understands why your number beats the contractor who quoted a flat square count. Unexplained higher prices lose; explained higher prices win.
Step 3: Decide what the homeowner sees of the report
This is the step contractors most often get wrong, and there are two deliberately different options.
Option A — send the full measurement report. Useful when you want the homeowner or an adjuster to see technical detail: insurance work, commercial bids, any job where a supplement is likely. Pair it with the claim documentation guide.
Option B — send the Customer Copy. Every Roof Manager report includes a free Customer Copy: the aerial imagery and roof diagrams, without the measurements.
That difference matters more than it first appears. The Customer Copy shows the homeowner their roof — aerial view, plane diagram, visual proof you measured properly — while keeping your take-off numbers out of circulation. Hand over a full measurement report and you have given a homeowner the exact square count, edge lengths and material quantities they can forward to three competitors, who now skip the measurement step entirely and undercut you using your data.
The Customer Copy gives you the credibility without the exposure. For residential retail work it is usually the right default. For insurance and commercial work, where documentation is the point, send the full report.
Step 4: Send it, get it signed
Email the finished proposal directly from the builder. Proposals go out from your own connected Gmail — so the message arrives from your company, not from a software vendor. Connect Gmail once in the builder before your first send.
The homeowner receives a private link. On that page they review the proposal, see the embedded report or Customer Copy, and accept and sign online with a signature pad — no printing, no scanning, no attachment they need software to open. Walkthrough: how to create a proposal.
An accepted proposal becomes an invoice in your Invoices module. If you have connected Square, that invoice can carry a Pay Now link so the homeowner settles it online; without Square connected, the invoice still sends and tracks, you just collect payment your usual way. Walkthrough: how to create an invoice.
How to automate roofing proposals with preset pricing templates
Everything above describes building a proposal by hand. Preset templates are how you stop doing that: configure your standard pricing once on the Proposals page, then every future proposal builds itself against it.
The builder offers two template modes, and you pick the one that matches how you actually sell:
| Template mode | What the homeowner sees | Use it when |
|---|---|---|
| Line Item Proposal Template | Your products listed with per-unit prices; quantities come from the roof report | You sell on detail — itemized scope, insurance and commercial work |
| Price Per Square | One clean total at your $/square rate for that roof's pitch — no material lines | You sell on simplicity — residential retail replacements |
Step 5: Set a price per square for each pitch
In Price Per Square mode you set a rate for every pitch from 4/12 through 12/12 — nine rates. A roof whose pitch falls outside that range clamps to the nearest end of the table, and the builder tells you when it has done so. The dashboard shows your progress as "N of 9 pitches priced", so you can see at a glance whether the table is complete.
If you have never priced this way formally, here is why it is the correct model rather than an accounting nicety.
Pitch changes the job. A 4/12 is walkable; a crew moves across it at full speed with standard equipment. A 10/12 is not — it needs fall protection, roof jacks and staging, a slower pace, more experienced hands, and a different insurance posture. Steep-pitch work carries materially higher labour cost per square than walkable slope, which is why most established roofing companies quote it separately.
A single blended rate therefore overprices your easy roofs and loses them, or underprices your steep roofs and you eat the difference. Usually both, in the same week.
| Pitch | Category | What changes on site |
|---|---|---|
| 4/12 | Walkable | Standard crew and equipment, fastest production |
| 5/12 – 7/12 | Standard | Comfortable footing, modest slowdown toward the top |
| 8/12 – 9/12 | Steep | Fall protection and roof jacks, slower pace, experienced crew |
| 10/12 – 12/12 | Very steep | Full staging, specialist crew, premium insurance exposure |
Set your rate for each pitch once. The report already carries the roof's pitch, so the correct rate applies automatically on every proposal you build from that point on. That is a calculation nobody does accurately by hand at 9pm. More on pitch itself: the complete guide to roof pitch.
Or preset your pricing line item by line item
In Line Item mode you preset pricing per product — ridge cap and valley per foot, drip edge, pipe boots per unit, disposal, permits — and Build from Report multiplies each material quantity from the report by your price. Set the per-unit coverage on your shingle (how many square feet a bundle covers) and the engine converts squares to bundles correctly instead of assuming three per square.
Build it once to match how your company actually prices. It is the highest-leverage hour of admin work you will do this year. Related: roofing proposal software that prices itself and what a material take-off actually is.
The one-click result
With a template configured, the workflow collapses to: open Proposals, attach the roof report, press Build from Report. Your preset pricing meets the report's exact sizing and materials, and out comes a finished, branded, ready-to-send document. No measuring, no arithmetic, no transcription.
That is what makes same-day quoting across an entire storm-damaged street realistic rather than aspirational.
How to use Rover, the AI assistant in the proposal builder
Step 6: Draft with Rover
Rover is Roof Manager's built-in AI assistant, available inside the proposal builder as Draft with Rover, which opens a side-chat next to the proposal you are working on. It does three distinct jobs.
It answers questions about the builder without you leaving the screen. It writes content — scope of work, warranty wording, material specifications, exclusions, payment terms: the language estimators dislike writing. It drafts the whole proposal from a single prompt.
Prompts that work well:
- "Build a full roof replacement proposal for this address using architectural shingles: tear-off of one layer, synthetic underlayment, ice and water at eaves and valleys, ridge vent."
- "Write a plain-English scope of work a homeowner with no construction background can follow."
- "Add a good / better / best option set at three price points."
Treat Rover's output as a strong first draft, not a final document. The measurements come from the report and are reliable; the language is generated and deserves your eye, because it is your company name on the page.
Four proposal habits that raise close rates
The builder is the tool. These are the habits that turn it into revenue.
1. Offer three or four options, not one. A single price invites a yes-or-no decision, and the homeowner's other two bids are already on the counter. An option set changes the question from "should I do this?" to "which one?" Preset templates make a good/better/best set nearly free to produce. If you are still choosing a platform, the 2026 roofing CRM buyer's guide covers what to look for.
2. Send the same day. Speed is one of the few levers that lifts close rates without cutting price. A report back in under an hour plus a one-click proposal means you can quote from the driveway before you have left it.
3. Show the roof, not the math. Lead with the Customer Copy diagram. Homeowners cannot evaluate your square count, but they can evaluate whether you look like you know their house.
4. Make it signable in one link. Every step between decision and signature is a chance for the homeowner to call someone else.
Common mistakes to avoid
Building the proposal before ordering the report. The report is the input; hand-building the quote first wastes the automation.
Sending the full measurement report to a retail homeowner. Use the Customer Copy. Your take-off is a competitive asset — do not hand it to the homeowner's next three bidders.
Running one blended price per square. Mixed-pitch roofs are the norm. A flat rate silently loses money on every steep plane you touch.
Leaving the pitch table half-filled. The dashboard tells you how many of the nine pitches are priced. An unpriced pitch is a proposal you cannot build in one click.
Never updating your template. Material prices move. Revisit preset pricing quarterly.
Letting Rover send unread. AI drafts fast; it does not carry your liability.
Frequently asked questions
How do I create a roofing proposal in Roof Manager?
Open the Proposals module, start a new proposal and attach the roof measurement report for that property. Press Calculate Materials to generate the take-off from the report, add your pricing and line items, choose whether the homeowner receives the full report or the measurement-free Customer Copy, and email it from the builder for online review and signature.
Can Roof Manager build a roofing proposal automatically?
Yes. Set up a preset pricing template on the Proposals page — either a price per square for each pitch, or per-unit pricing on your line items — then attach a report and press Build from Report. The proposal is built from your preset pricing and the report's exact sizing and materials. The quantities come from Calculate Materials, which derives the take-off from the report's 3D sloped areas, edge take-offs, plane data and waste percentage; set the coverage on your shingle and the engine converts squares to bundles from that coverage rather than assuming three bundles per square.
What is the Customer Copy of a Roof Manager report?
The Customer Copy is a homeowner-safe version of the roof measurement report, included free with every report. It contains the aerial imagery and roof diagrams but no measurements, so you can show a homeowner their roof without releasing your take-off numbers to competitors.
Can I include the roof measurement report in the proposal?
Yes. The proposal a homeowner opens can embed either the full measurement report or the measurement-free Customer Copy. Full report detail suits insurance and commercial work; the Customer Copy is usually the better default for residential retail proposals.
What is Rover in Roof Manager?
Rover is Roof Manager's built-in AI assistant, integrated into the proposal builder as Draft with Rover. It answers questions about the builder, drafts content such as scope of work and warranty wording, and can draft an entire proposal from a single prompt.
Why should I price roofing per square by pitch?
Because pitch changes the cost of the work. Steeper roofs require fall protection, staging, a slower pace and more experienced crews, so they cost materially more per square to install than walkable slope. A single blended rate overprices easy roofs and underprices steep ones. Roof Manager lets you set a rate for every pitch from 4/12 to 12/12 and applies the right one automatically, because the report carries the roof's pitch.
Can customers sign a roofing proposal online?
Yes. The homeowner receives a private link, sent from your own connected Gmail, where they review the proposal and accept and sign it online with a signature pad. An accepted proposal becomes an invoice in your Invoices module.
Can homeowners pay online?
Yes, once you have connected Square. An accepted proposal becomes an invoice, and with Square connected that invoice can carry a Pay Now link the homeowner settles online. Without Square connected the invoice still sends and tracks; you collect payment your usual way.
How much does the Roof Manager proposal builder cost?
The proposal builder is part of the Roof Manager CRM, which is free with unlimited team members. Satellite roof measurement reports — the input to the builder — are $10 CAD each, with your first two free, no credit card required, and a 30-day money-back guarantee on your first paid report.
How long does it take to build a roofing proposal?
One click with a preset pricing template configured. Building manually takes roughly ten minutes, and Rover can draft a full proposal from a single prompt in about a minute. The measurement report itself is typically delivered in under 60 minutes.
Key facts: Roof Manager proposal builder
| Item | Detail |
|---|---|
| What it is | Roofing proposal and estimate builder inside the Roof Manager CRM |
| Input | Satellite roof measurement report for the property address |
| Build methods | Manual line items, preset template + Build from Report (one click), or Draft with Rover |
| Auto-populated | Material take-off from 3D sloped areas, edge take-offs, plane data and waste % |
| Template modes | Line Item Proposal Template, or Price Per Square by pitch (4/12–12/12) |
| Homeowner attachment | Full measurement report, or the free measurement-free Customer Copy |
| Delivery | Private link emailed from your own connected Gmail; online review, accept, e-signature |
| After acceptance | Becomes an invoice; Pay Now link online when Square is connected |
| Cost | Builder free with the CRM (unlimited team members); reports $10 CAD each, first 2 free |
| Report turnaround | Typically under 60 minutes, 99% measurement accuracy |
| Built for | Roofing contractors, restoration companies, solar installers, insurance adjusters |
Build one and see
Run one job through it. Order a report on your next address — the first two are free — then open Proposals, attach that report, and see how much of the document is finished before you have typed anything. Then spend twenty minutes on your preset pricing template. Every proposal after that is one click.
The contractors winning right now are not the ones with the lowest number. They are the ones whose quote arrives first, shows the homeowner their own roof, prices the steep planes correctly, and can be signed from a phone.
Create your free Roof Manager account — your first two roof measurement reports are on us. Or compare plans on the pricing page.